 Preparing For Your First Backcountry Trip
As Published in West Coast Horsemen, July 2015
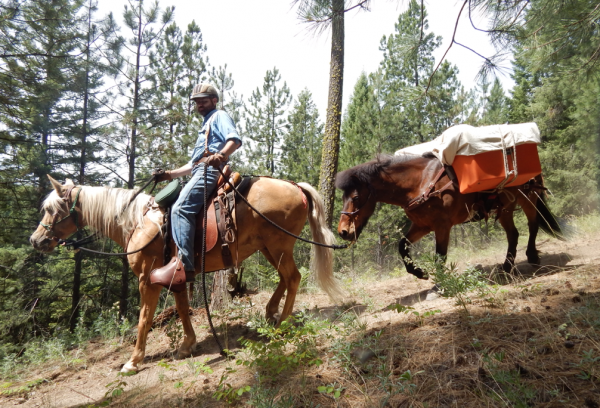
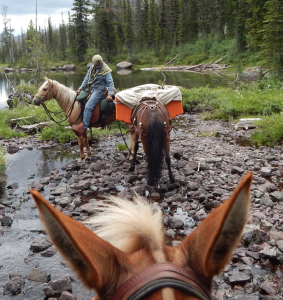
For many of us the ultimate in equine vacations is the idea of venturing into the backcountry with our own horse. Day rides and camping with your horses at an established campground is good. Camping with your horses in the depths of the backcountry is grand. But how to plan a trip into an area where the clatter of civilization is drowned by the serenity and solitude of the wilderness? Loading a packhorse with the necessities, and leaving the trailer far behind ups the ante from a standard day ride, but with planning and preparation you’ll be set for some of the most memorable outdoor experiences of your life.
Use the following 6 steps to help you plan and prepare for your backcountry horse camping adventure.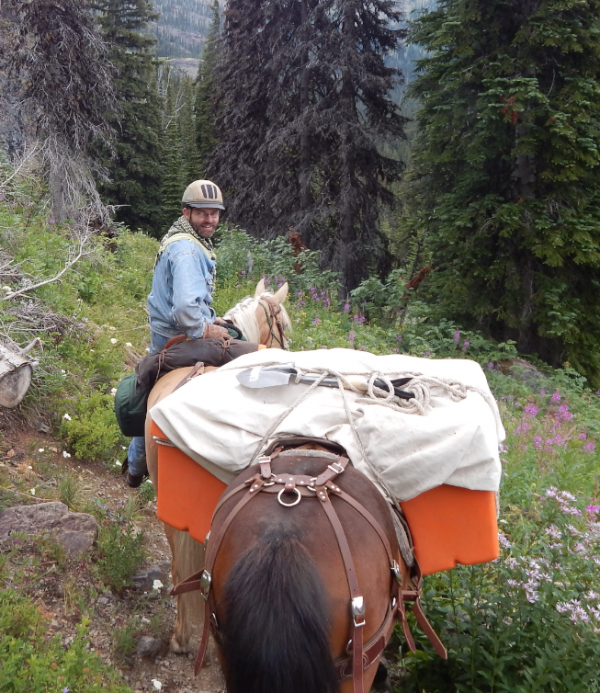
Step 1 – Where Do I Go? – The first step in any backcountry trip is deciding where to go and picking a destination point. The key is to pick an area that is inspiring, matches your skill sets, and fits within your time and budget constraints – for example if you like mountain riding and are looking for a three day trip on well marked trails, the Bob Marshall Wilderness complex might be ideal. www.trailmeister.com, regional equine clubs, and the land manager’s recreational rangers are excellent resources for choosing a destination and selecting a trail route if you don’t have one in mind.
Time of Year – Consider the best time of year to visit the spot you’ve picked out. Mid summer is perfect for the high mountains of the Cascades and Rockies, while fall is the perfect season for areas on the east coast. Climate, elevation, and terrain will factor into what types of shelter you’ll need for you as well as if you’ll be able to find water and grazing for your animals.
Trail Type and Distance – What type of route are you planning? A loop with a new view each day? Out and back to a scenic lake? A point-to-point trek that might require having someone shuttle your truck and trailer? As you’re determining how many miles you’ll be riding each day consider the terrain you’ll be passing through and whether you desire a leisurely pace or want to cover a lot of ground on your trip. Depending upon where you’re heading a good rule of thumb is that horses in the backcountry will travel at about 3 miles an hour.
Maps and Regulations – Research popular trail areas online at www.trailmeister.com, acquire necessary trail maps and guidebooks for the area that you’ve chosen. Be sure to learn the rules and regulations for the area with the local land manager before you go. Are campfires allowed? Is weed free feed required? Is grazing allowed? Where can you expect to find water? Are permits required? Be sure that your horses are up to date on any vaccinations and that you have the necessities for crossing states lines; coggins test, health certificate, and brand inspections.
Step 2 – What Should I Bring? – Most of what you end up carrying will be determined by your destination and what type of weather you’ll most likely encounter. All of the tack and camping gear that you take should be as practical, comfortable, and as lightweight as possible. Your pack animal will thank you!
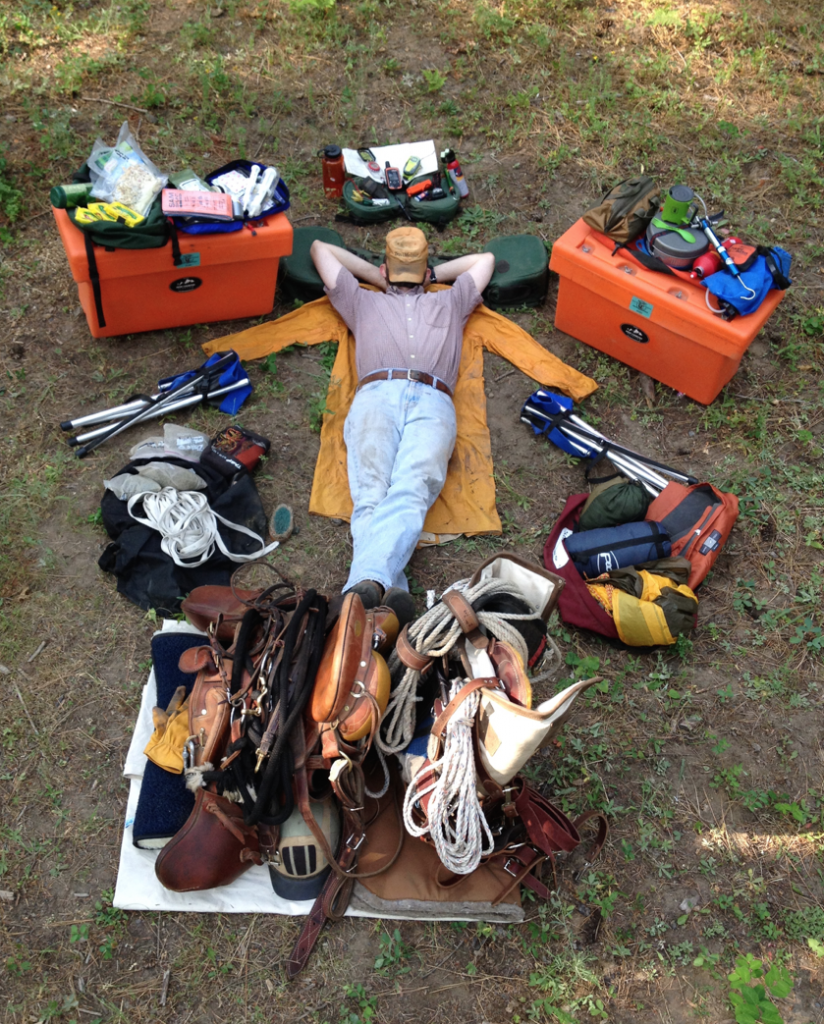
Organize your gear into the following kits for the majority of pack trips.
Human Needs
Clothing – Rain pants and jacket, stocking cap and gloves, camp shoes, insulating layers, etc.
Shelter – tent / hammock, foam insulation pad, sleeping bag, etc.
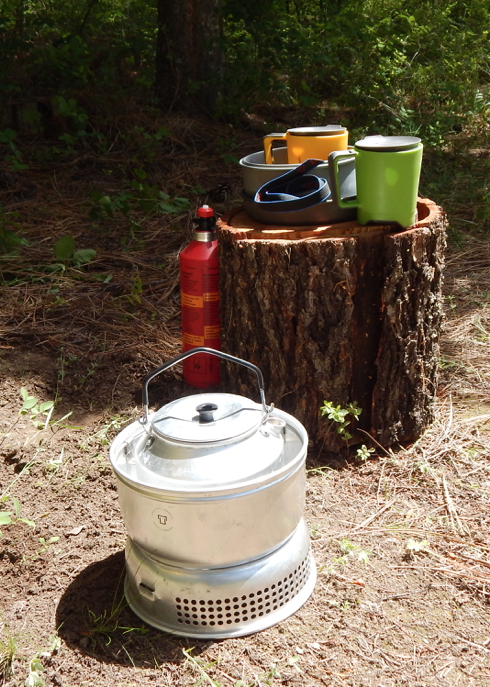
Cooking – lightweight backpacking stove and fuel, pots, cooking utensils, cup, bowl, spork, sponge and soap, water filter, etc.
Emergency / Essentials – First Aid kit, PLB, headlamp, lighter/matches, map and compass, duct tape/ repair kit, knife, toiletries, camera/journal, etc. Remember to keep the essentials on your person in case you separate from your riding animal.
Equine Needs
Riding Saddle – Make sure that they fit well and that you have good saddle pads as well.
Pack Saddle – The two main types of pack saddles are the Sawbuck and the Decker. Each type has its own strengths and weaknesses. More important than which type of pack saddle is that you have the knowledge to use it. An excellent tutorial manual is The Packers Guidebook by Ed Haefliger (http://www.mtcanaryco.com).
 Panniers – Unless you’re going to be wrapping your load in mantis (and if you’re reading this you most likely won’t be) you’ll need some type of bag, box, or container to hold your camp. Options include hard boxes that can deter a hungry bear or soft bags that are more flexible on your pack animals. Regardless of the type, balance is everything, so be sure to load them with the same weight on each side. Panniers are easy to learn and work well.
Saddle Bags – There are many different types of saddle bags available. Use them sparingly and only for lightweight items, It is entirely too easy to place to put too much weight behind the saddle and over your riding animal’s kidneys. Be careful when using saddle bags, you don’t want them to interfere with mounting and dismounting.
Horn Bags – Indispensible for holding the camera for calendar worthy trip photos!
Containment Options – There are several good options for keeping your animals in one place during your trip. I use all of three. Before using any of these techniques in the backcountry make sure to get your horses used to them at home first.
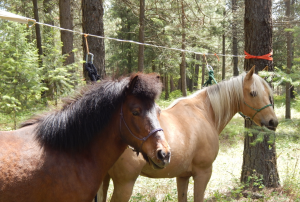 Highline – The gold standard. A strong rope strung between two sturdy trees protected by tree savers will ensure that you’ll be riding instead of walking the following morning.
Hobbles – Will nearly immobilize your horse. At first. Where grazing is permitted hobbles are an excellent way to allow your animals to graze while under your strict supervision.
Electric Fencing – Another excellent way to allow your animals to graze and relax while under your supervision. Electric fencing is not a substitute for a highline. Your animals may believe in the bite of the fence, but the local elk, moose, or deer population doesn’t and they are apt to bolt and tear down the thin line.
First Aid Kit – Check with your veterinarian for suggestions about what to take and how to treat minor bumps.
Brush, curry, hoof pick, insect repellent, collapsible bucket, etc.
Trim the Fat – As you are putting together your gear, consider the weight and volume of what you plan on taking. Think about what you can easily do without, which items can do double duty, and pare everything down to the essentials. Your animals will be doing the hard work of transporting you and your stuff. Do them a favor and only take what you need, not everything that you “want.” Regardless of the trip and your wants, a well-stocked First Aid kit that can serve both you and your mounts is a necessity as well as the knowledge on how to address emergencies.
Step 3 – What’s to Drink? – Unlike trailhead camping it’s not practical to haul water when you’re further afield. Instead you’ll need to plan your trip around reliable sources of water for the area and season. Always call before you haul. Talk to the land manager or reliable local riding groups that might have good data on lakes, streams, and other water for your horses to drink from.
The scoop on H2O is a bit more complicated for the humans on the trip. Where equines are much more tolerant of water in the wild, we puny humans are at risk from any of a number of water borne parasites. They come with many names; Beaver Fever, Forest Flu, but most people simply call it Giardia or “Hell on Earth”. It’s not pleasant. Thankfully prevention is straightforward. Treat your water before you use it, cook with it, or drink it. Treatment can be as simple as boiling, adding purification tablets or filtering.
 Step 4 – What’s for Dinner? – Meal planning is all about packing enough calories to fuel your days without asking your animals to tote a ton of extra weight. Regardless of whether you decide to purchase pre-made meals or create your own, be sure to create a meal plan for each day.
Trying to pack the amount of hay or feed that horses and mules eat on a daily basis is cumbersome and impractical at best. It creates a miserable spiral of requiring more livestock to haul the feed, which in turn requires more feed to support the greater number of animals. Instead plan your trip around good grazing areas. Most good grazing areas will usually have a water source nearby so it’s really not that hard to do. Again contact the land manager or local riding group for first hand information on where and when to expect to find graze and water.
Organize – Make packing your meals easier by removing bulky packaging and placing ingredients for each meal in a zip-top or vacuum bag. Label them Breakfast Day 1, Dinner Day 2, etc. This will help keep everything organized and avoid a campsite yard sale.
Protect – Whether it’s a Chipmunk or Grizzly bear (the former is much more likely than the latter) you’ll want to protect your food from the natives. Bear resistant pannier boxes are readily available and even required in many areas. Hanging food is another option to keep the local inhabitants out of your backcountry cuisine.
Extras – There’s nothing better than a good meal at the end of a long day on the trail. Elevate the standard camp meal to a new dimension by including a few extras like a block of cheese, some fresh veggies, or a chocolate bar!
Step 5 – What if Something Bad Happens?
Stick to the Plan – Make sure that someone reliable has your trip itinerary. Your trip itinerary should include at a minimum, which trailhead you’re departing from, where you’re camping, when you’ll return, and any critical medical issues (i.e. diabetes, etc.). This info will help guide local authorities in case you don’t return on time.
Carry a PLB – In remotes areas beyond the reach of cell coverage a Personal Locator Beacon (PLB) can send a distress signal to alert local authorities and Search and Rescue teams if you have a real emergency.
Take the Skills and Gear You Need – All the gear in the world won’t help you if you don’t know how to use it. Take a First Aid course, for humans and one for horses. Learn to use a map and compass. With some basic knowledge, you’ll be able to handle most minor mishaps.
 Step 6 – What Can I do to Prepare?
Take a Test Drive – Take a short overnight trip before embarking on a longer trek or even better camp out in your backyard where mistakes and missing gear is more easily remedied. Your first times hobbling and setting up a highline will be much safer if you repeatedly practice at home. Becoming familiar with your equipment and making sure that it works well before you leave can save you major troubles down the trail. Practicing at home will give you the confidence to tackle it on the trail.
Get Fit – Both you and your horse need to be in shape for rigorous backcountry trips. Start a basic exercise program for both of you, at least, six weeks before your trip. Budget your time for at least 3-4 workouts and rides each week prior to your trip to achieve the minimum cardiovascular and muscle strength that you’ll need. Your vet and your personal physician can help you determine the optimum training regimes to get your mounts and you in the peak of shape.
You can have backcountry adventures by investing time in planning and preparing, and practicing at home. This will open the gates to endless travels and a lifetime of epic trips and memories. For more information on this and other trail riding and horse camping topics visit www.trailmeister.com the world’s largest guide to equine trails and horse camps.