How to Tie Up Your Horse – As published in the Northwest Horse Source Jan 2012 issue
“Trust in God, but tie up your horse” is a practical Proverb. Even though you want to spend as much time as possible riding your horse or mule, eventually you’ll have to dismount and tie them up.
When securing your equine it is very important that all pieces of the system (not just the object that you’re tying to, but also the lead rope and the halter) be strong and sturdy. I often see the use of a breakable link, such as baling twine or bungee, when tying. If the intent of tying a horse is to prevent it from wandering off, why tie it to or with something that is easily broken? Upon questioning, the owner invariably says the link prevents damage to the horse or tack. The well-intentioned owner may have prevented some harm to equipment, but in the process taught the horse it can break away. Train yourself to tie common knots and your stock to stand quietly while tied before you hit the trails (winter is an excellent time to do so).
While this article is primarily concerned with the knots to use, equally important when tying a horse is ensuring that the lead line is not too long. Make sure that the lead is just loose enough that the horse can move its head, but short enough that it can’t get a leg over.
Any knot that a horseman uses should be easy to tie, resistant to slipping, and easy to untie in an instant. The knots shown below meet these criteria and will help you to secure your horses and mules regardless of where you are.
The “King of Knots” comes with a handy mnemonic to help you tie this essential knot for riders; the rabbit runs out the hole, goes around the tree, then back down the hole.
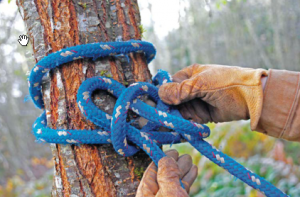
Tied properly the Bowline is the foundation for a highline, tying to hitching posts, and any other situation where you want a loop that won’t slip under pressure and is easy to untie. Remember leave no trace principles: if tying to a tree wrap the rope around the tree a few times to prevent bark damage, or use tree saver straps, then tie the bowline with a quick release end.
Learn the Bowline in 7 steps:
- Your lead rope (the “tree”).
- Wrap the rope around the object you’re tying.
- Form a loop (the “hole”) in the rope on the horse side.
- Put the working end through the first loop (“the rabbit runs out the hole”).
- Run the working end around the standing portion of the line (“the rabbit runs around the tree”).
- Now make a bight (double over the rope) in the working end and pass through the first loop (“the rabbit goes back down the hole”). Make sure that the end of the rope does not pass though, this is the “slippery” part of the knot that allows it to untie quickly.
- Tighten and you have a knot that won’t slip and unties quickly with a quick tug on the end of the rope.
 Quick Release Trailer Safety Knot
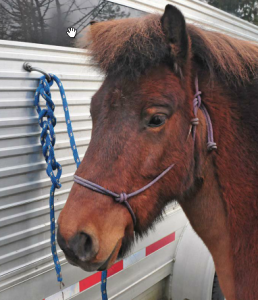
We’ve all tied our mounts to the side of a trailer, outside a stall, along an arena wall, or at a hitching rail to saddle up for a ride or check tack. I’ve often seen people use elastic trailer ties for this purpose under the false impression that the “give” in the elastic is easier on the horse. Unfortunately when the bungee breaks (“when” not “if”) the metal snap flying straight at the horse’s head doesn’t help teach it to stand quietly. There’s a better safer way to secure stock to a trailer or wall; first train your stock to stand quietly while tied and then teach yourself how to tie a Trailer Safety Knot.
The Trailer Safety Knot is essentially a series of half hitches tied in the bight by passing one through another. Tied correctly this is an easy slip resistant knot that comes apart quickly if trouble arises.
- Begin by taking the working end of the lead rope (opposite the horse end), and form a bight (double over the rope).
- Pass the bight through the trailer tie ring.
- Take the working end of the rope and form another bight.
- Pass the new bight through the loop formed by the previous bight.
- Continue three or more times.
- Pull the knot tight by pulling the part of the rope indicated by the arrow. Do not let the working end of the rope come through the loop.
As always you can learn more about this topic and many others of importance to horse riders at www.TrailMeister.com .


